
Dispersed is a distributed GPU compute network and a subnet of the Render Network ecosystem, built for machine learning workloads like inference. Instead of buying hardware, you choose a GPU from the network, run your job in an isolated Docker container and pay an hourly rate while it runs.
In this guide, we run a real inference job end to end: generating an image with ComfyUI and the Z-Image-Turbo model. You'll pick a recipe, choose a GPU, secure your web UI, watch the job start, generate an image and stop the job so billing ends. The same flow works for LLM inference, video generation, fine-tuning and more.
Step 1: Sign in. Go to console.dispersed.com, sign in with your OTOY account and open Run. You'll see three steps: select a recipe, select hardware, configure and review. Pro tip: an OTOY account allows you access to Dispersed. Creating one is simple and free.
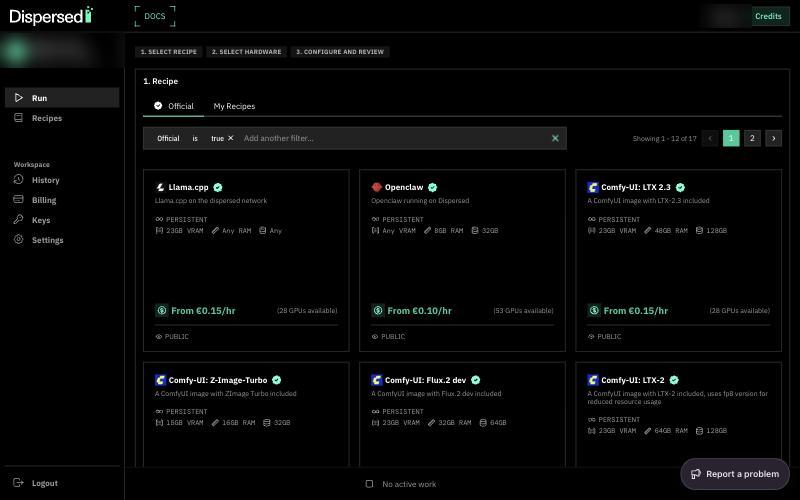
Step 2: Pick the recipe. Under 1. Recipe, choose Comfy-UI: Z-Image-Turbo. The recipe is a pre-built template that allows you to access ComfyUI, the open-source LLM for generative workloads, primarily known for image and video generation. The recipe in Dispersed features the Z-Image-Turbo model, which needs 15GB of VRAM and is a PERSISTENT job, so it runs until you stop it.
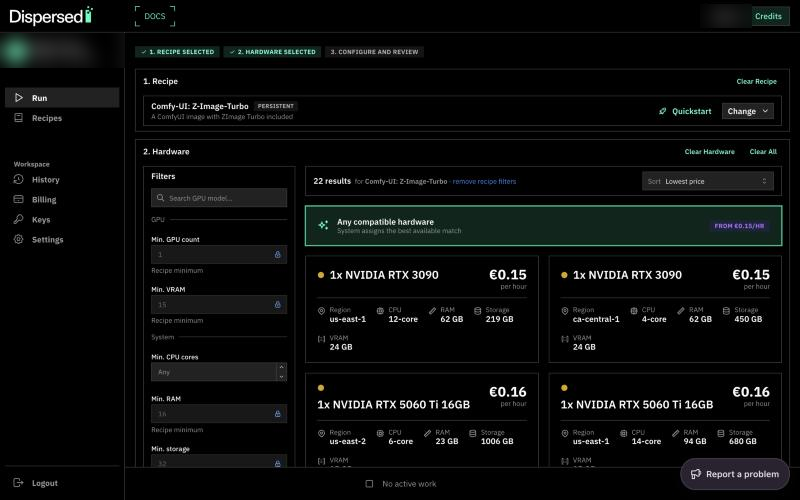
Step 3: Pick a GPU. Under 2. Hardware, choose a card. For this recipe we saw RTX 3090 at €0.15/hr, 5060 Ti at €0.16, 5070 Ti at €0.18, 4090 at €0.36 and 5090 at €0.44. "Any compatible hardware" assigned us an RTX 5090 at €0.44/hr, so pick one yourself to control cost.
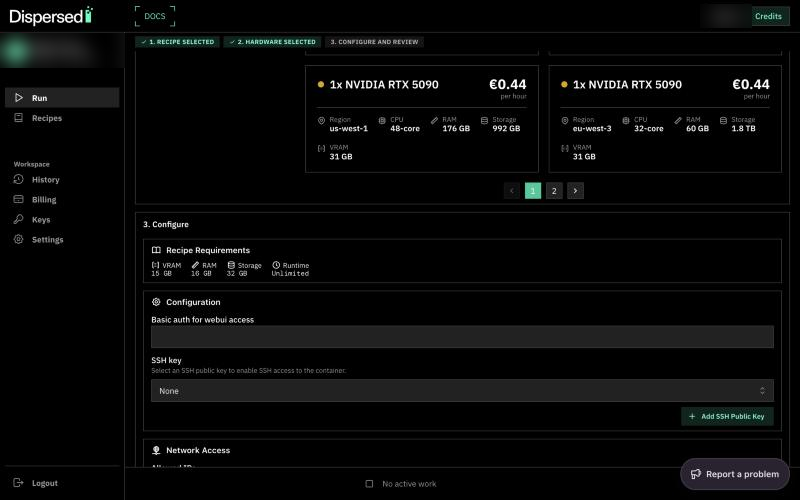
Step 4: Configure your job, set up two things.
printf "yourname:$(openssl passwd -apr1)\n"
Type your password twice when asked. Nothing shows while you type, and both entries must match. Write the password down, because you can't change it once the job is running. Copy the line it prints (like yourname:apr1…) into the field. You'll log in later with your username and password, not this line. Windows doesn't include openssl by default, so test this on Windows before publishing.
SSH key is optional and not needed for making images.
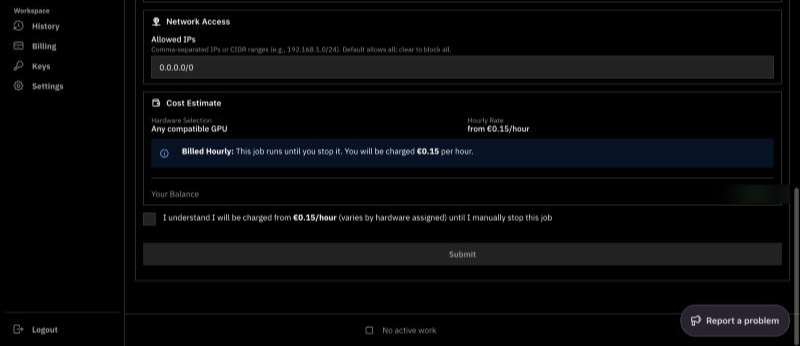
Step 5: Submit. Check the cost estimate against your balance, tick the billing box and click Submit.
Step 6: Wait for it to run. The status goes pending → assigned → preparing → running. Preparing took us about 1 minute on one machine and 11 minutes on another.
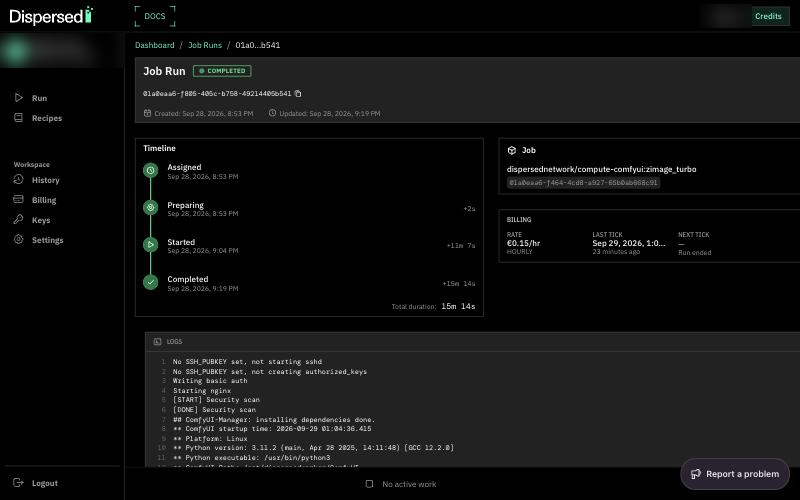
Step 7: Open ComfyUI. On the Job Run page, click the Connection link and log in with your username and password.
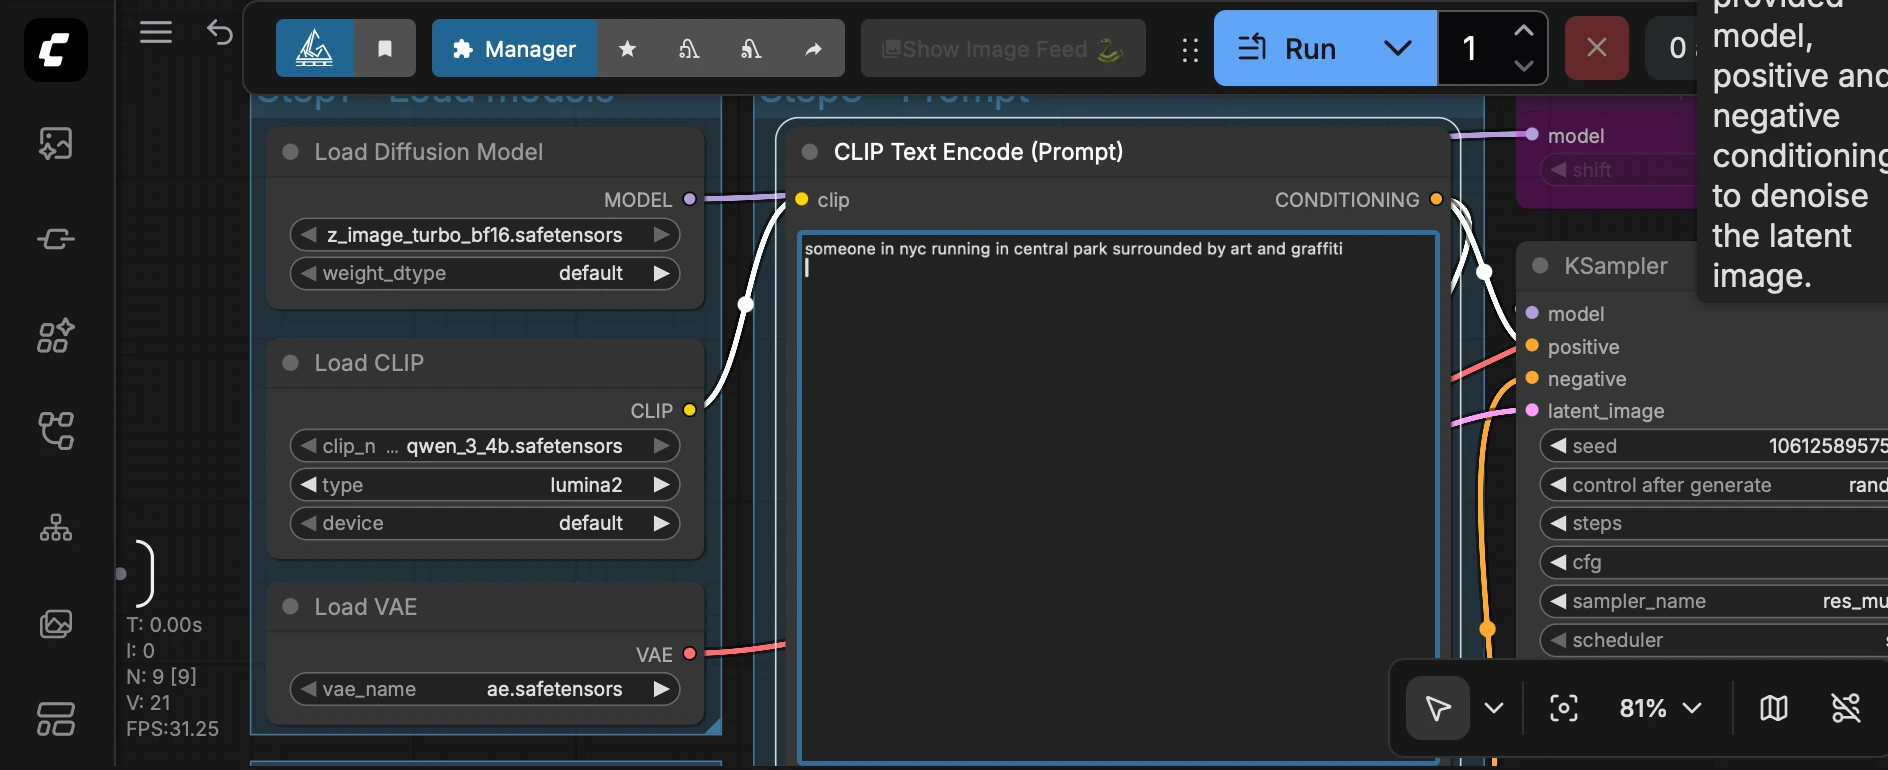
Step 8: Make an image. In ComfyUI, open Templates (see box 2 in the screenshot below) → Image → Z-Image-Turbo Text to Image. The workflow loads with the Z-Image-Turbo model already selected.
In ComfyUI:
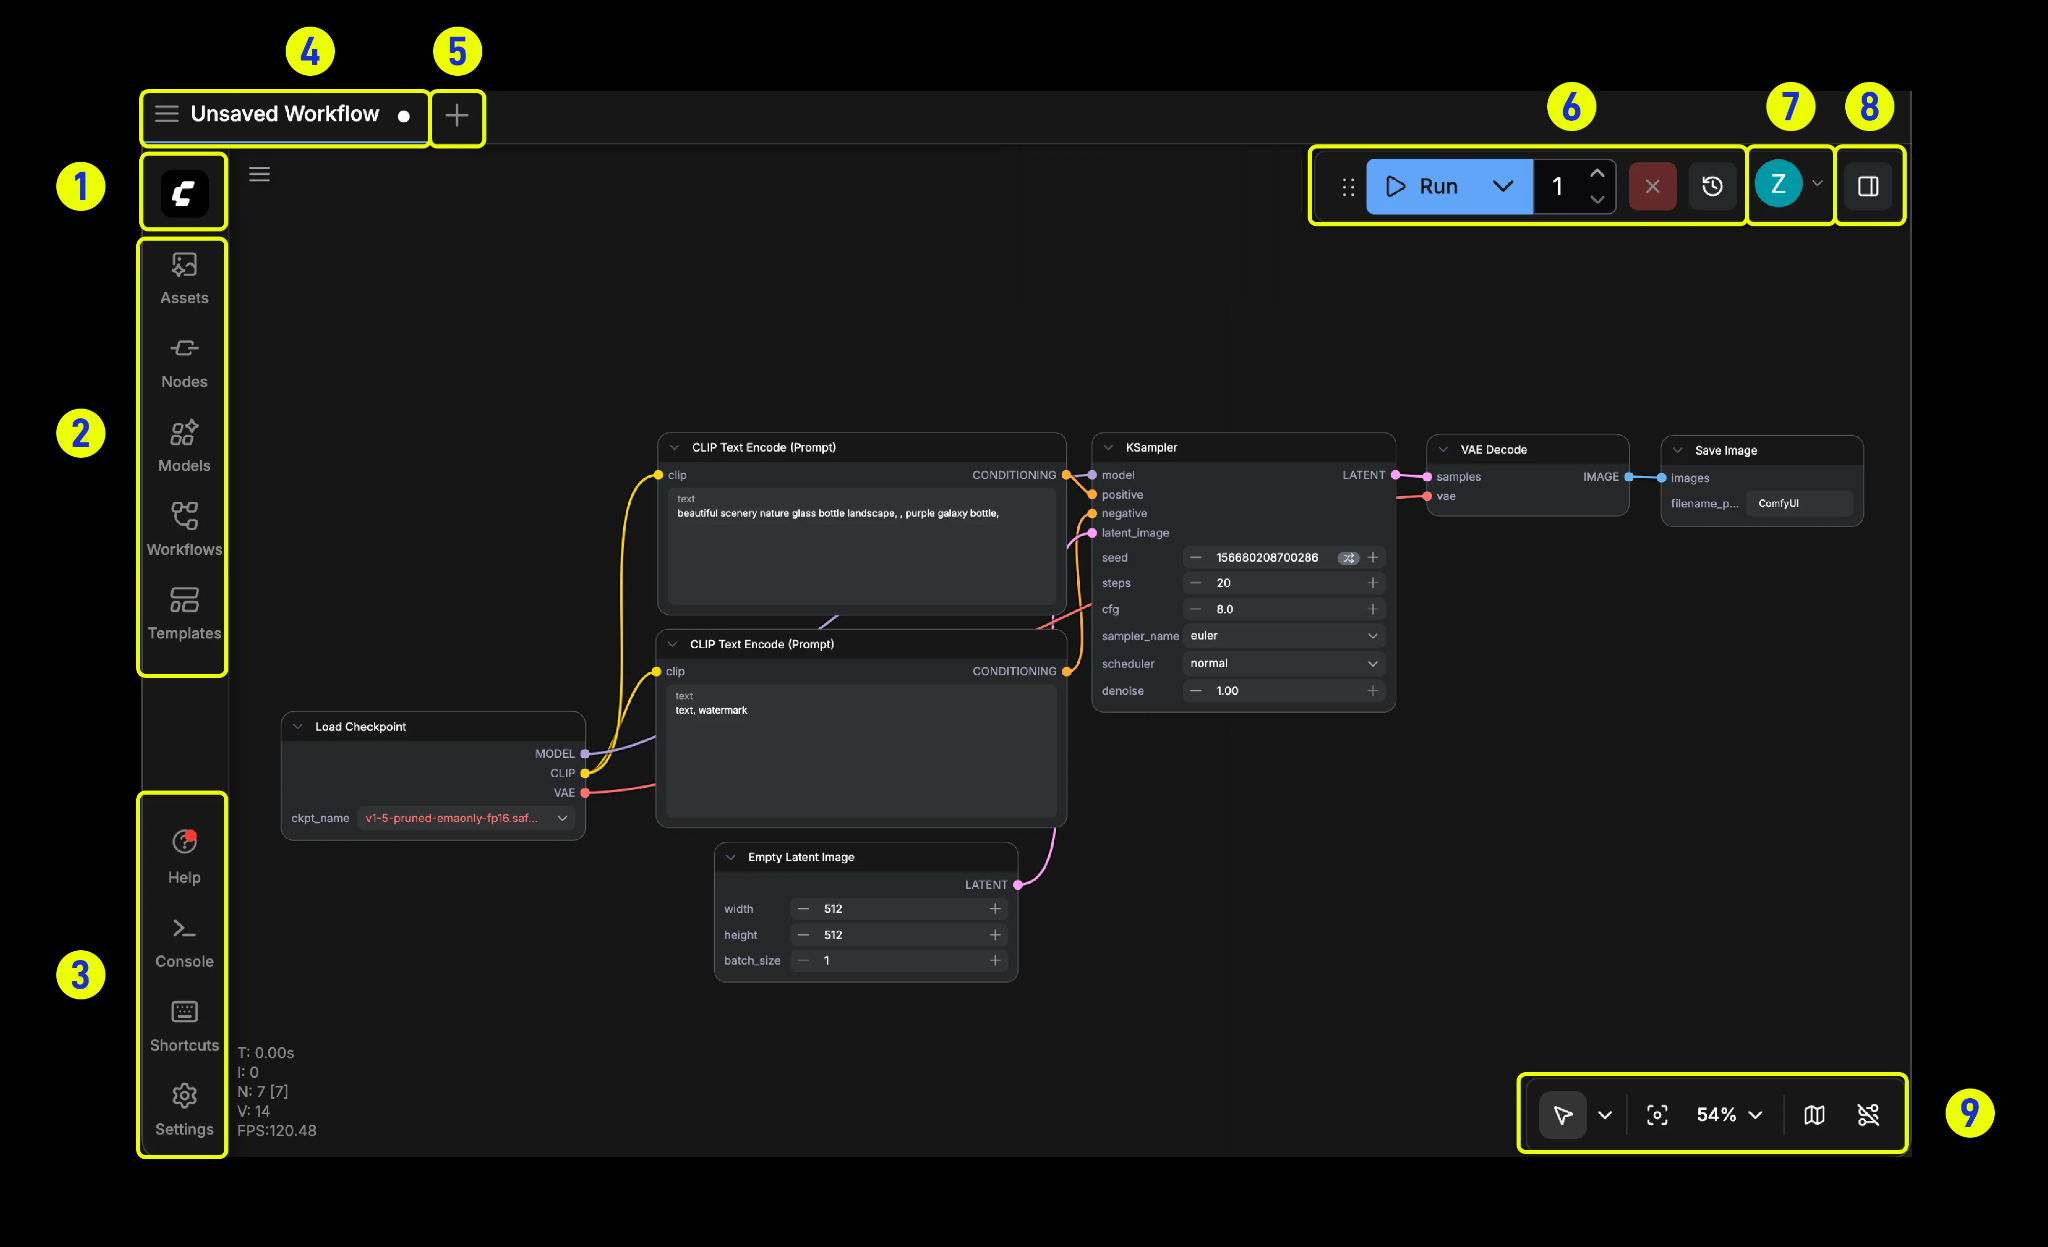
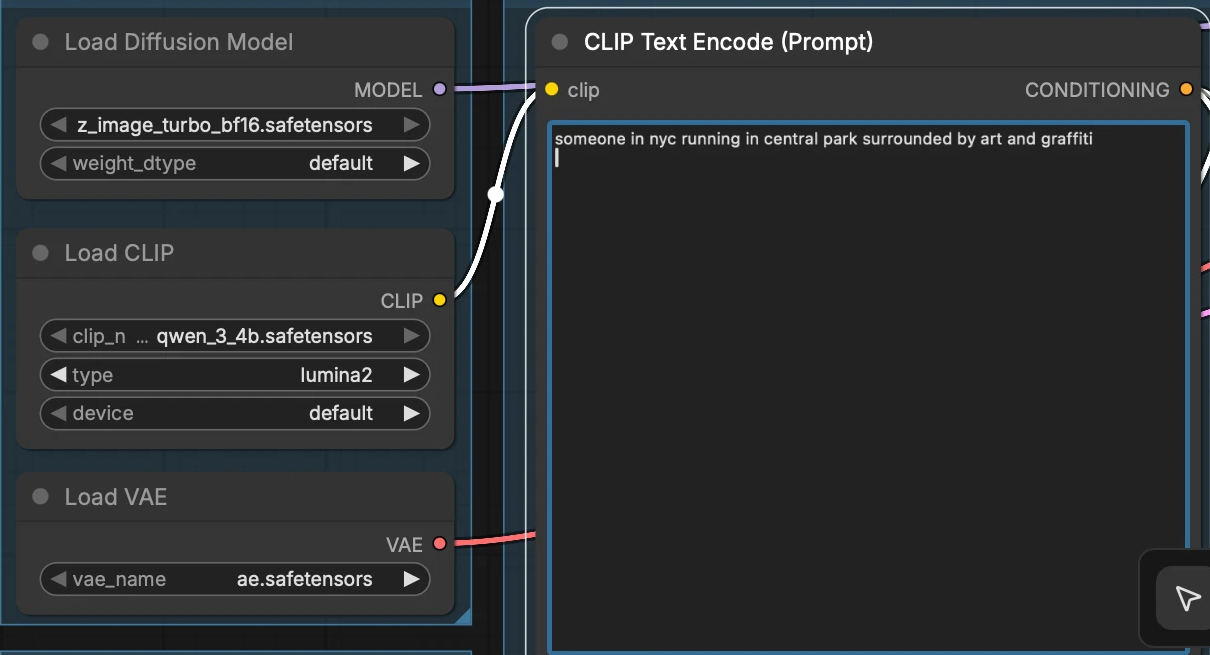
Type your prompt in the text box (CLIP Text Encode) and click Run. The GPU on Dispersed generates the image, and it appears in the feed at the bottom. Save it.
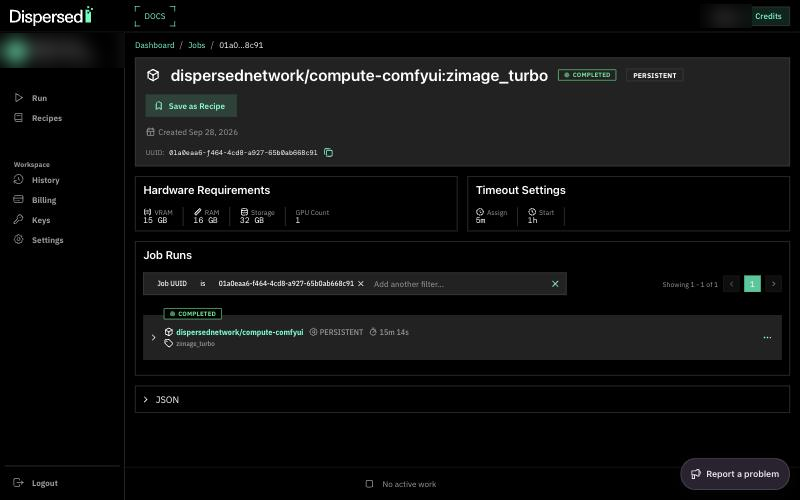
Step 9: Stop the job. Back in the console, open the job and click Stop Job. The status changes to Completed and billing stops.
Tips from your first run:


