
Dispersed lets you rent GPU compute by the hour and run AI workloads like LLM inference on hardware from its distributed network.
Dispersed is a distributed GPU compute network and a subnet of the Render Network ecosystem built for general compute workloads, including AI inference. Instead of purchasing and maintaining your own hardware, you can choose a GPU from the network, launch your workload in an isolated container, and pay an hourly rate while your job is running.
In this step-by-step guide, we'll use the Llama.cpp recipe on Dispersed to run Qwen3.8 27B on an NVIDIA RTX 5090 GPU from start to finish.
You'll learn how to choose the Llama.cpp recipe, select a GPU, secure access to your job, launch the model, sign in to a private chat interface, send your first prompt, and stop the job when you're finished so billing ends.
Your prompts are sent to the model you've selected running on your rented GPU rather than to a third-party AI provider's API.
Before getting started, you'll need:
Let's get started.
Go to console.dispersed.com and sign in with your OTOY account. Open Run and select Llama.cpp. The recipe runs llama.cpp in server mode and comes preloaded with Qwen3.8-27B, tuned for GPUs with 24GB of memory or more.
Click Quickstart any time to read the recipe's guide. It's reference only, so nothing starts when you open it.
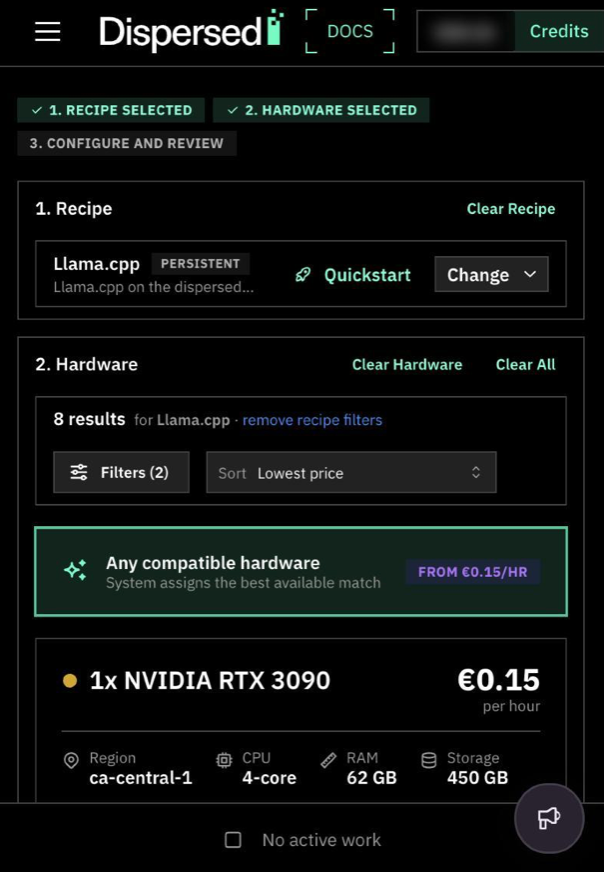
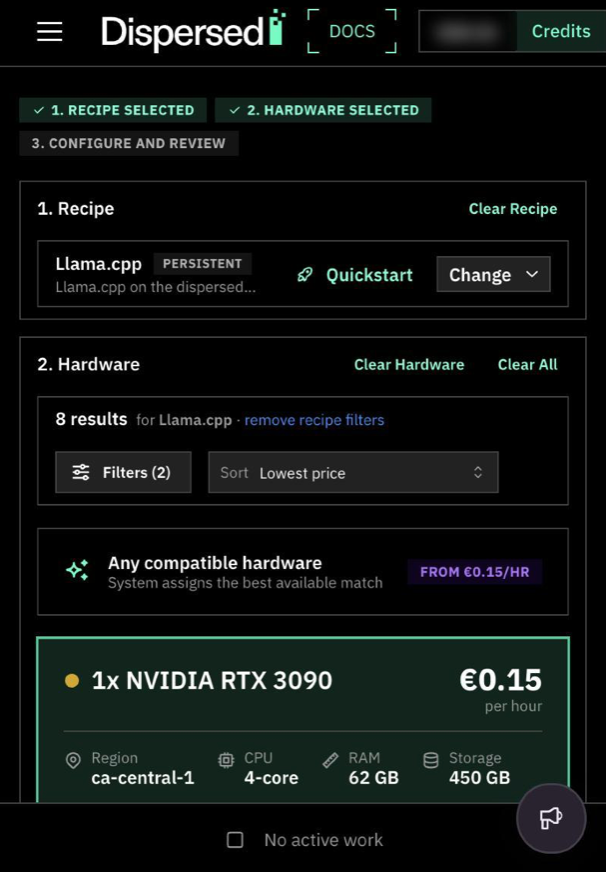
The recipe needs at least 23GB of VRAM, so the hardware list only shows cards that qualify. In our test, options ranged from an RTX 3090 at €0.15/hr to two RTX 5090s at €0.88/hr. We picked the RTX 3090 (24GB).
Choose a specific card yourself: "Any compatible hardware" may assign a pricier one than you need.
Pro tip: If you’re not sure how much VRAM your model needs, use a tool like LLM configurator to estimate VRAM requirements and find suitable hardware for better performance.
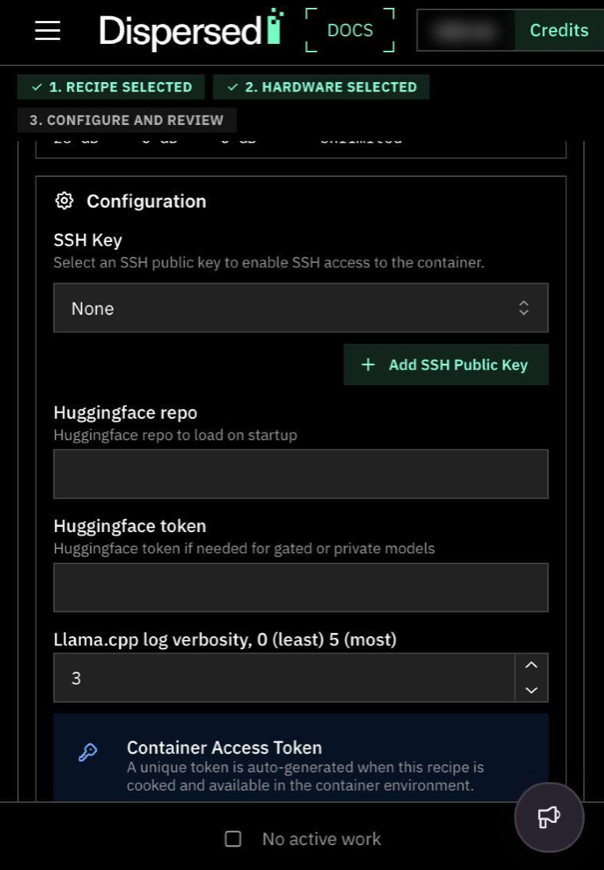
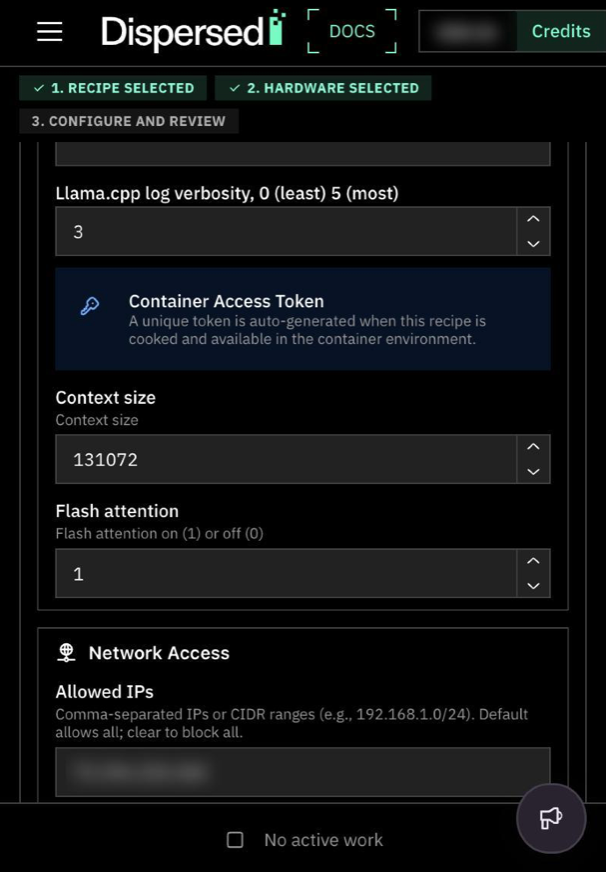
To use the preloaded Qwen model, leave Huggingface repo and Huggingface token empty. To try a different open model, paste its Hugging Face repo (for example, ggml-org/gpt-oss-20b-GGUF); expect a longer startup while it downloads.
The token is only needed for gated or private models. Leave log verbosity, context size and flash attention at their defaults. You don't need an SSH key to chat.
Set Allowed IPs to your own public IP. The default allows anyone to try to connect. Search "what is my IP" on Google and paste the number in. Note the Container Access Token: Dispersed generates a unique one for each job, and you'll use it to sign in.
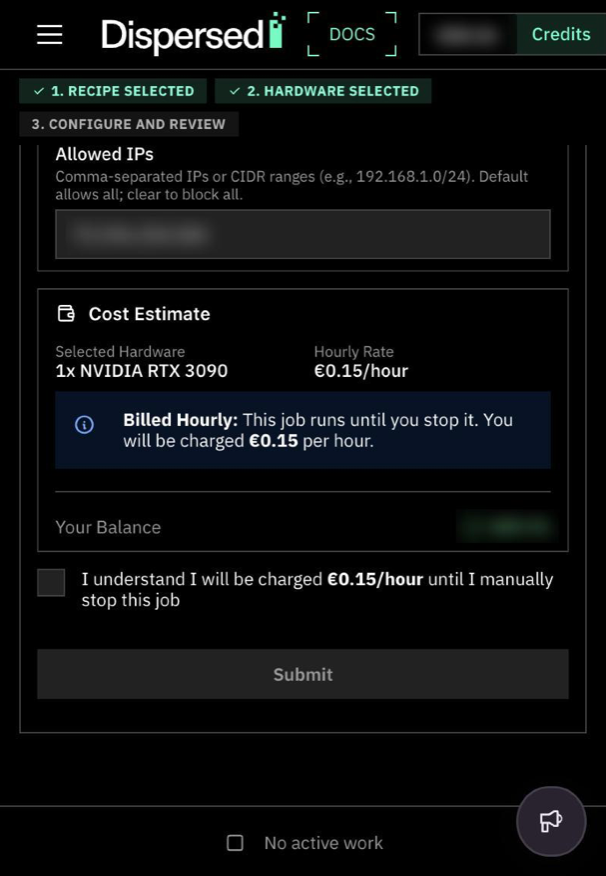
Check the cost estimate against your balance, tick the billing box and click Submit. The job is persistent: it runs, and bills hourly, until you stop it.
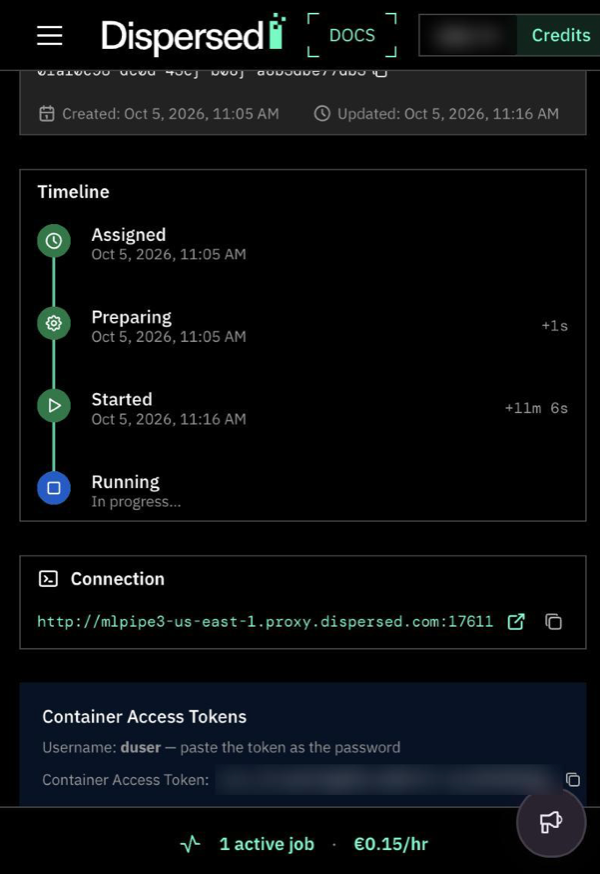
The status moves from assigned to preparing to running. On a fresh machine, preparing took about 11 minutes, since the container includes the full model. When we reran the job on the same machine, it started in 13 seconds.
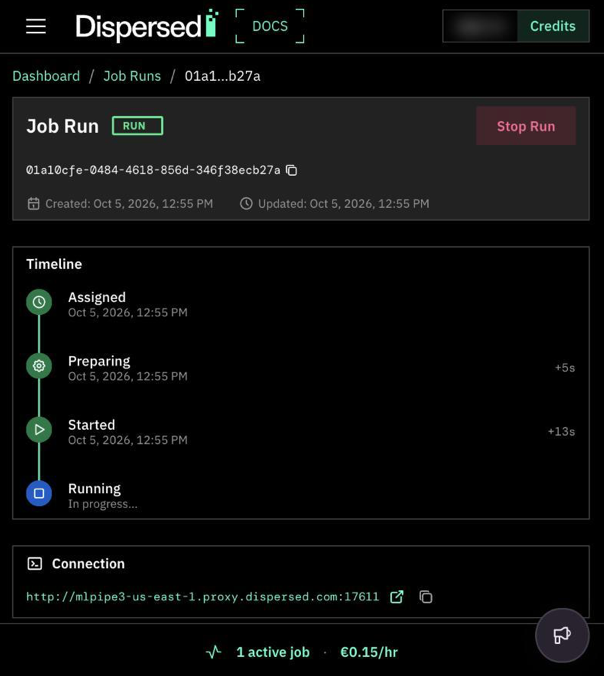
Open the Job Run page. Copy the Connection link and the Container Access Token. Open the link in a private or incognito browser window, which avoids a saved login from an earlier job getting in the way.
Sign in with the username “duser” and paste the token as the password. The link uses plain http, so treat the token as a per-job, throwaway password.
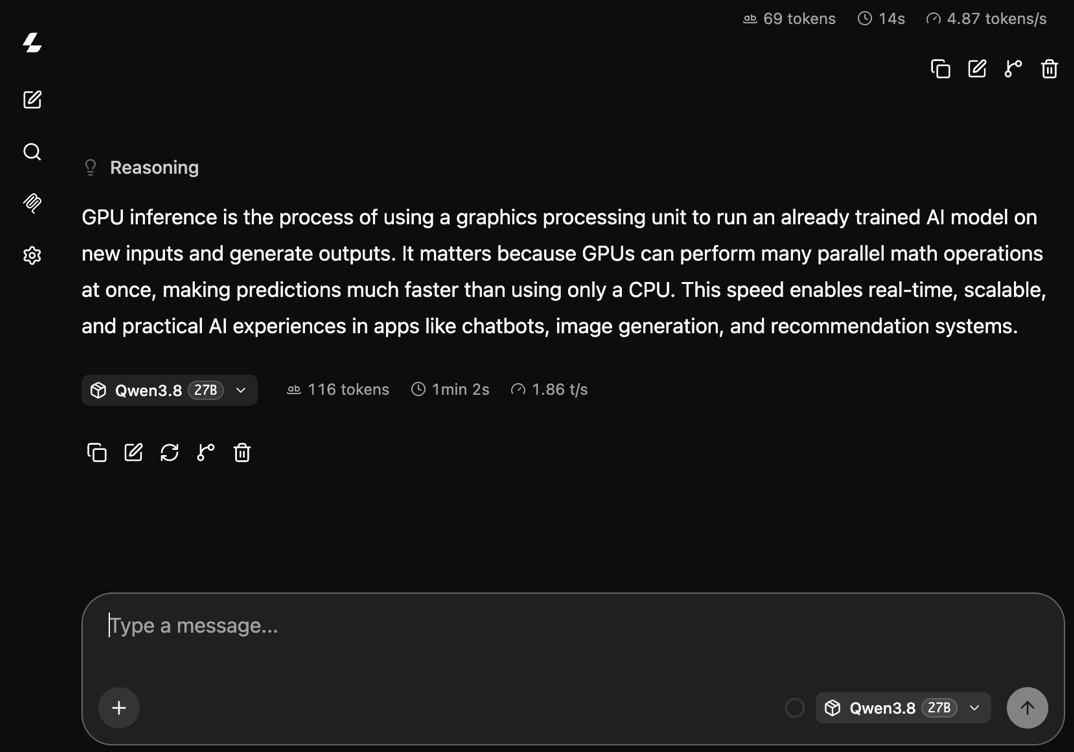
You'll see a chat interface with Qwen3.8 27B selected. Type a question and press send. We asked it to explain GPU inference in three sentences. The interface also shows how many tokens were generated and how long it took. Response speed depends on the model, its settings and the GPU you choose.
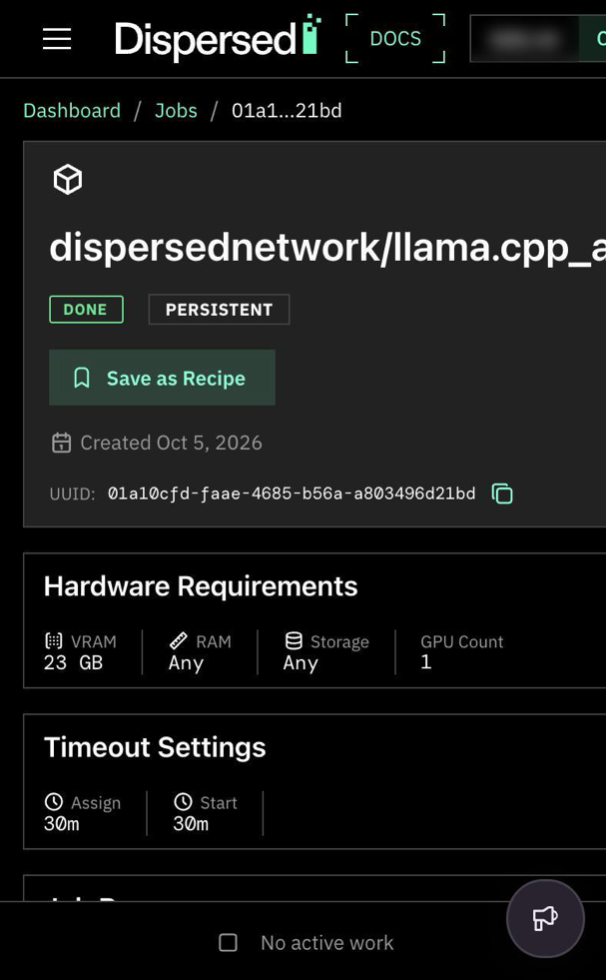
Go back to the console, open the job and click Stop Job, then confirm. The status changes to DONE and "No active work" appears at the bottom. Billing is hourly, so stop before the next hour starts.
1. Pick your GPU yourself to control cost.
2. Set Allowed IPs before you submit.
3. Open the Connection link in a private window and paste the token with the copy button.
4. Plan for about 11 minutes of preparing on a fresh machine.
5. Stop the job as soon as you're done.
The same flow works across the console: pick a recipe, choose a GPU, configure access, run and stop. Try loading a different open model through the Huggingface repo field and compare answers side by side. Start at console.dispersed.com.


